![[pitch tool]](30janlap10.jpg) Pitch tool construction
Pitch tool construction
Pitch tool constructionThis document describes the pitch tool for the 8-inch f/5.5 mirror I'm constructing. Details of that mirror
are on another Web page. Last edit for this page was June 06 2006. This is still major revision in June 2006 and is incomplete.
Jan 30 2006:7PM. At Gordon Waite's ATM session this evening, I looked at my mirror after pad polishing and could only find one small scratch, about one inch from the edge and maybe 1/3 inch long. Good enough for pitch polishing!. A sphereometer check gave a center radius of about 89.21 inches and a radius at about 1" inside the edge of 89.15 inches. At 8:45PM we set up to create the pitch lap.
But first he wanted me to specify the working temperature for my polishing. His preference for the pitch and beeswax mix he uses is 65 to 70 degrees F. Then he instructed me
to wipe down the tool with turpentine on a paper towel, just enough to wet the tiles.
When he inspected the tool, he noticed the missing tile along the edge, and a portion of another missing tile further along the edge. "That's gonna be a problem," he said, because it may create an air pocket when the pitch is poured over it or near it. Air in pitch can get heated and expand when the tool is warmed before pressing: too much heat and it can
create a bubble. Gordon described his new-to-me method of making a pitch tool.
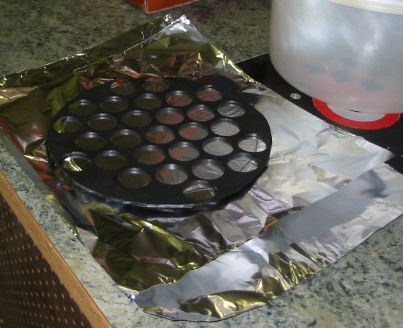
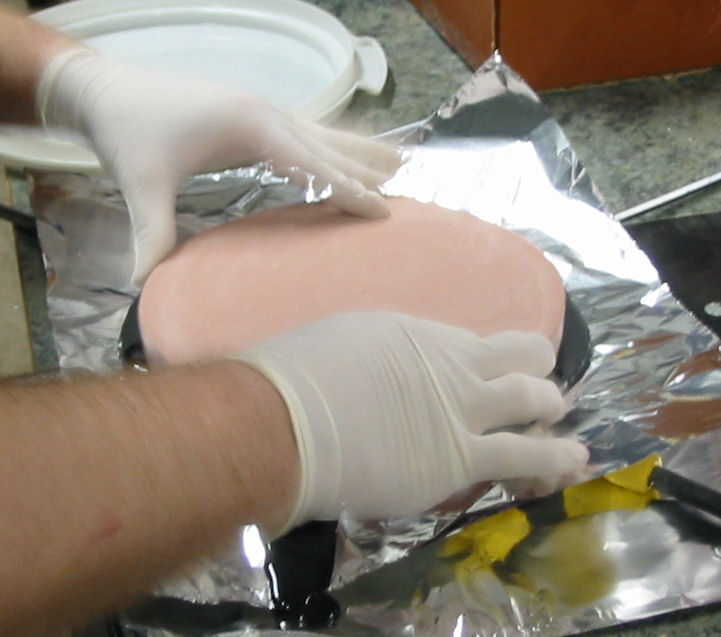
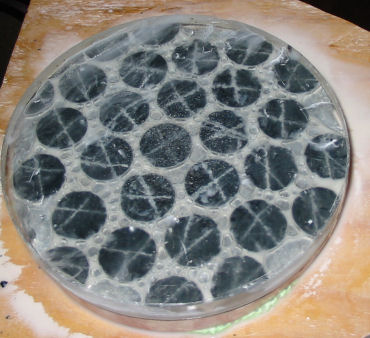
Essentially, he pours out the pitch onto the tool over a hole mask, then pulls the flexible mask and excess pitch off the tool. Preparation is a little busy but critical. It's a good idea to put on latex gloves, to keep pitch off your hands when doing all this work. Aluminum foil is spread under the mirror on the table, to catch pitch runoff. The mirror is set face up on the foil, and some oil is applied. Then another layer of foil goes over the mirror. The rubber tile mould is laid atop that foil, and aligned so that the holes are NOT symmetric with the mirror. Both layers of foil are turned upward a bit, or proped up with loose bits of wood at the corners, to act as bowels to keep the pitch off the table and floor when poured.
Meanwhile, the pitch was warmed up on a hotplate at low heat, below the temperature where ANY boiling of turpentine will occur - even small bubbles or foam. By 9:30PM, when the pitch was completely melted and the mirror and tool mask prepared as above, he brought over the pitch and poured it carefully over the mask, filling in the holes. He then covered the mask and holes with a uniform layer of pitch. Then the black&white tile tool, previously wetted with turpentine, is laid face down on the poured pitch. (Also he made sure the mask holes were not under the missing edge tiles.)
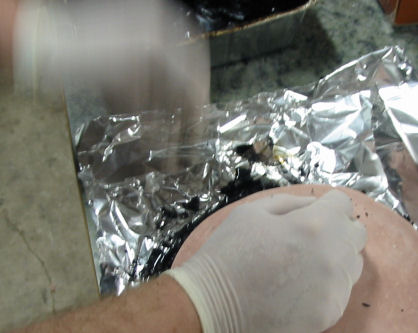
By 9:45PM the pitch was cooled enough to handle the new pitch tool. The first order of business was to remove the overruns of pitch around the base of the mirror. Then with a razorblade, Gordon chopped off the excess around the base of the tool. Then the mirror and tool were flipped over and the mirror carefully removed from under the tool. Then the mask was pulled from the tool
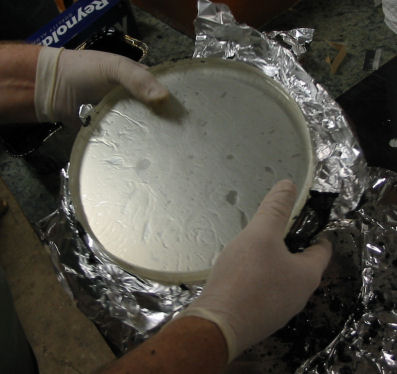
like a soda can pull-top. With a razor blade, Gordon cut off the remaining bits of pitch extending around the edge of the tool, leaving a clean well-formed pitch lap and a tarred up mask,
as held up by Gordon Waite in the linked image.
Gordon suggested my first press would be easy. Just cerox the tool and mirror, cold; put the tool atop the mirror, and let it sit OVERNIGHT ONLY (several hours), by its own weight. DON"T FORGET and leave it sit longer, he cautioned. I got home too late to try it that evening but I did it later in the week.
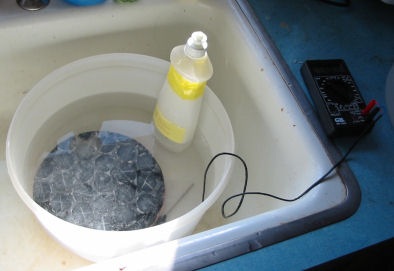
Meanwhile, to prepare the surface of this pitch tool in January, Gordon instructed me to run the tool under COLD water in the sink and use the same razor blade to put an X across each facet of the tool. "Don't worry about chipping" he noted. Then use a small brass wire brush to scour the tool. "The point", he explained, "is to remove the chips and to rough up the tool. Make the crosses somewhat random: don't follow a pattern. Hold the tool in one hand, and make several similar LIGHT scratches across some facets. Then rotate the tool and do this again. Get two scratches across each facet." Of course, hold the tool UNDER the pitch, don't grip the pitch! "A lot of beginners make that mistake."
Otherwise, the use of the pitch tool was the same. At the start of a session, put the mirror and the tool and CerOx bottle in warm water in a shallow pan. "No hotter than 110 degrees," he cautioned, and only for a few minutes. Remove the mirror from the pan and squirt some CerOx on it. With the tool still in water, poke the pitch (not on the facets!) at intervals with a fingernail; when the pitch BEGINS to get soft, then immediately pull the tool out and CerOx it, and press it promptly on the mirror. "Press with care: too long or too hot and you'll squish the pitch. Too short or too cold, and the tool won't conform to the mirror surface - that's evil." After pressing leave the tool on the mirror in place until both have cooled, then begin polishing. With that advice in mind, I cleaned, scratched, and scoured the tool and put it away. The mirror was then washed with water and a drop of soap (to get the oil off, remember?) and also put away.
A few months later in April, Gordon refined his methods for preparing the pitch tool for a set of sessions as follows:
1) Clean the tool under tap water, using a small brass brush. Hold the tool in COLD water under tap and scrub the facets.
You'll see their surface go from white to black as you scrub off the old cerox. This also roughs up the surface. (Earlier
Gordon would also slash the surface of the pitch squares again as described above. Some time later he did not do this.)
2) Then run warm water to heat it up for under a minute, rotating the tool so no part is under the tap very long. Put in a pan of warm water, 100 to 110 degrees F. Give time for the pitch to get soft to your fingernail, checking along the edge between the facets. DOn't touch the facets! (Later Gordon did not use the pan of warm water, he warmed the tool by holding it under the tap of hot water.)
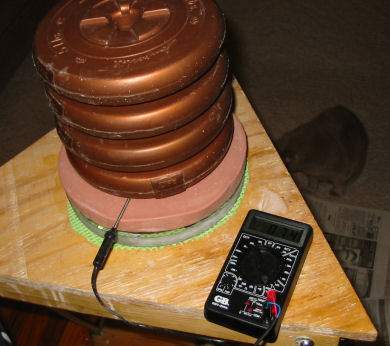
3) Coat with 1 micron Cerox. Press for 5 minutes with 20 lbs weight. Then remove weight and let cool for 6 minutes.
4) Before starting the session after pressing, break the lap free by hand with some controlled side pressure to the tool, as it will initially stick to the mirror. Force it off slowly about an inch to one side and move around without pressure until it stops sticking. Don't move it much or for long - it encourages astigmatism, and you don't need to distribute the Cerox.
5) Use the tool for only several minutes at a time - five minutes typically. Too long and the pitch will either dry out or the pitch and mirror will get too warm and expand or soften correspondingly. Then add Cerox in place by moving the mirror
aside carefully. COLD press for five minutes, work for several minutes, cool for several minutes.
The goals are first to work the glass SMOOTHLY. Secondly, work with sufficient PRESSURE and FRESH CEROX to remove glass. Other considrations are important but these are the most important. Don't overheat the glass or mirror - allow time to cool. And repress the tool at intervals to insure CONFORMITY between glass and pitch. At longer intervals, CLEAN AND ROUGHEN the pitch tool to restore Cerox and to recreate the "microfacets" which do the work of polishing.
(this is in progress) To a first order, the work of the pitch tool is ALONG THE EDGE OF THE TOOL. Short strokes over the center work the edges of the mirror as the tool edge only moves along the outer zone. Longer strokes over the center work further into the mirror. But a 1/3 COC stroke will ALMOST ALWAYS achieve a sphere by working ALL of the mirror. OFFSET STROKES achieve more specific results and should be used with great care and briefly. W-STROKES are almost NEVER used for polishing, and only if you've got a "belly button" in the center for some reason.
In addition, the pitch tool is used for FIGURING and PARABOLIZING, and there are stokes unique to those methods.
Herb Johnson
Copyright © 2006 Herb Johnson
![[pour pitch]](30janlap3.jpg) Pouring the tool
Pouring the tool
An alternative to microfaceting by screen
![[pitch tool]](24feb06_t1.jpg) I was surprised when Gordon also advocated this "scratch and scour" at intervals during pitch polishing. "What about microfaceting with a screen?", I asked. Previously Gordon used a screen and pressed that mesh onto a warmed pitch lap. Gordon said he had recently changed his methods. "As soon as you start polishing after microfaceting, the center of the facets became flat again and its effectiveness was reduced," he commented. "Scratching and roughing up the facets is quicker and just as effective." The brush scouring creates microfaceting-like surface, and the scratches avoids suction on a facet if it completely conforms to the mirror. "I do this now because it's faster."
I was surprised when Gordon also advocated this "scratch and scour" at intervals during pitch polishing. "What about microfaceting with a screen?", I asked. Previously Gordon used a screen and pressed that mesh onto a warmed pitch lap. Gordon said he had recently changed his methods. "As soon as you start polishing after microfaceting, the center of the facets became flat again and its effectiveness was reduced," he commented. "Scratching and roughing up the facets is quicker and just as effective." The brush scouring creates microfaceting-like surface, and the scratches avoids suction on a facet if it completely conforms to the mirror. "I do this now because it's faster."
Refined preparation of the pitch tool
The Pitch Tool In Use
Goals of pitch work
Actions of the pitch tool
Herb Johnson
New Jersey, USA
To email @ me, look at my commercial Web page for address